Lava Cake Recipe
Table of Contents
Introduction : Lava Cake Recipe
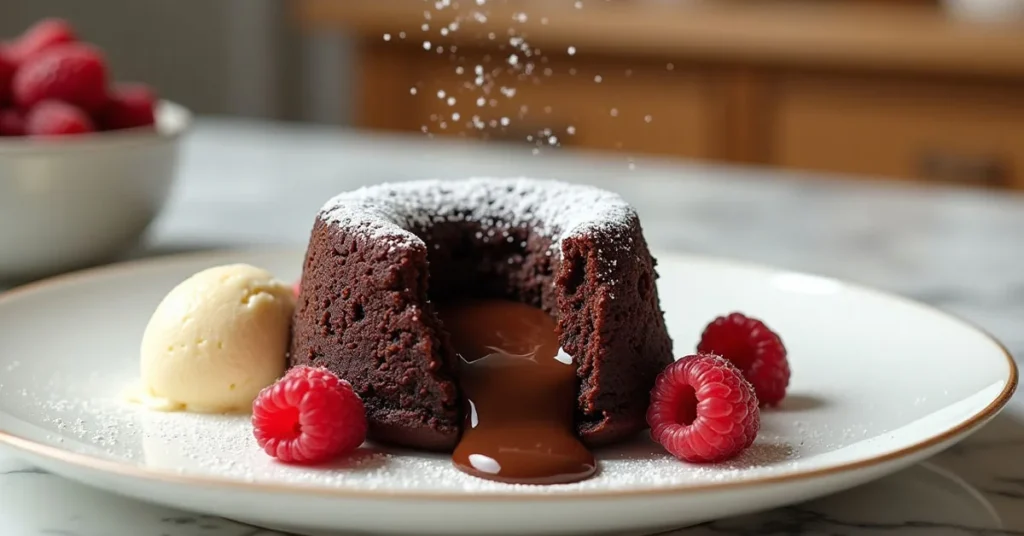
If you’ve ever dreamed of mastering a lava cake recipe that feels straight out of a restaurant kitchen, you’re in the right place. This beginner-friendly dessert is all about simplicity and satisfaction — a perfect balance between a soft, airy cake and a gooey molten center that melts in your mouth.
There’s something magical about cutting into a chocolate lava cake and watching that rich melted chocolate flow — it’s pure comfort in dessert form. Whether you’re craving a quick treat after dinner or planning to impress guests with a homemade lava cake, this step-by-step recipe makes it easier than ever.
At ChocoChefAI, we believe every baker — no matter their skill level — can create a decadent chocolate dessert that tastes as good as it looks. Ready to learn how to make your own molten chocolate cake masterpiece? Let’s dive in!
Why Choose This Lava Cake Recipe
If you’ve ever hesitated to make a lava cake recipe because it seemed too tricky — this one will change your mind. Designed for beginners and chocolate lovers alike, it’s foolproof, indulgent, and ready in under 25 minutes. You don’t need to be a pastry chef to achieve that signature molten chocolate center — just a few smart tips and simple ingredients.
Here’s why this chocolate lava cake deserves a spot in your dessert repertoire:
- Effortless yet impressive: With minimal prep and baking time, this quick chocolate dessert looks restaurant-worthy but is simple enough for any home baker.
- Rich, gooey perfection: The balance between a soft cake exterior and a warm, melted chocolate core is what makes every bite unforgettable.
- Customizable sweetness: Whether you prefer dark chocolate, milk chocolate, or even a mix of both, this recipe adapts beautifully to your taste.
- Perfect for any occasion: Serve it as a romantic dessert for two, a family treat, or an elegant finish to a dinner party.
💡 Pro insight: The secret to a perfect molten lava cake lies in timing — bake it just long enough for the edges to set while keeping the center luxuriously soft. Once you master that, you’ll have the best lava cake recipe that never fails to impress.
Here’s a professional, user-friendly recipe summary for your Lava Cake Recipe, formatted in a clear table structure suitable for any recipe platform:
| Recipe Details | Information |
| Preparation Time | 10 minutes |
| Cooking Time | 12 minutes |
| Total Time | 22 minutes |
| Portions | 4 individual cakes |
| Calories | ~380 kcal per serving |
| Categorize Recipe | Information |
| Course | Dessert |
| Cooking Method | Baking |
| Difficulty | Easy / Beginner-Friendly |
| Cuisine | French-inspired |
| Skill Level | Beginner |
💡 Note: Calories are approximate and can vary depending on the type of chocolate and additional toppings used.
This recipe is your golden ticket to a beginner-friendly dessert that delivers maximum flavor with minimal fuss — pure chocolate magic, straight from your kitchen.
Focus on Ingredients and Equipment
Before diving into the magic of this lava cake recipe, let’s set you up for success with the right ingredients and tools. Every element plays a part in achieving that iconic molten chocolate center, so choosing quality ingredients makes all the difference. Think of this as building your dessert from the ground up — with flavor, texture, and love.
Ingredients You’ll Need (for 4 individual cakes)
- 100 g of dark chocolate (70%) – gives that deep, rich chocolate flavor and smooth texture.
- 80 g of unsalted butter – adds creaminess and helps create that luscious molten core.
- 70 g of sugar – balances the chocolate’s intensity without making it overly sweet.
- 2 large eggs + 2 egg yolks – for structure, moisture, and that perfect gooey center.
- 40 g of all-purpose flour – just enough to hold everything together while keeping the texture light.
- A pinch of salt – enhances the chocolate’s depth and makes each bite more flavorful.
- (Optional) 1 tsp of vanilla extract – adds warmth and aroma to the batter.
- (Optional) A dusting of cocoa powder or powdered sugar for finishing.
💡 ChocoChefAI tip: Choose high-quality baking chocolate — the kind you’d happily eat on its own. It melts more evenly and gives your lava cakes that professional sheen.
Equipment Required
You don’t need fancy gear — just the essentials:
- 4 ramekins or small oven-safe molds (about 8–10 cm in diameter)
- 1 mixing bowl (heatproof for melting chocolate and butter)
- 1 whisk or electric mixer
- 1 rubber spatula for folding the batter gently
- 1 baking tray to hold the ramekins evenly in the oven
- Non-stick spray or butter for greasing the molds
Before You Begin
- Preheat your oven to 200°C (390°F). The right temperature ensures the outside bakes quickly while keeping the center molten.
- Grease your ramekins generously with butter, then dust lightly with cocoa powder to prevent sticking.
- Prepare your workstation — have all your ingredients measured and ready to go. This will make the process smooth and stress-free.
When everything is prepped and ready, you’re already halfway to dessert bliss! With the basics in place, the next step will bring your chocolate lava cake to life — and fill your kitchen with that irresistible aroma of melted chocolate and warmth.
Preparation Steps in Detail
Now that your ingredients and equipment are ready, it’s time to bring your lava cake recipe to life! This is where the magic happens — transforming simple ingredients into a rich, velvety molten chocolate cake that oozes perfection with every bite. Follow these steps carefully, and you’ll create a dessert that looks and tastes like it came straight from a professional kitchen.
Step 1: Melt the Chocolate and Butter
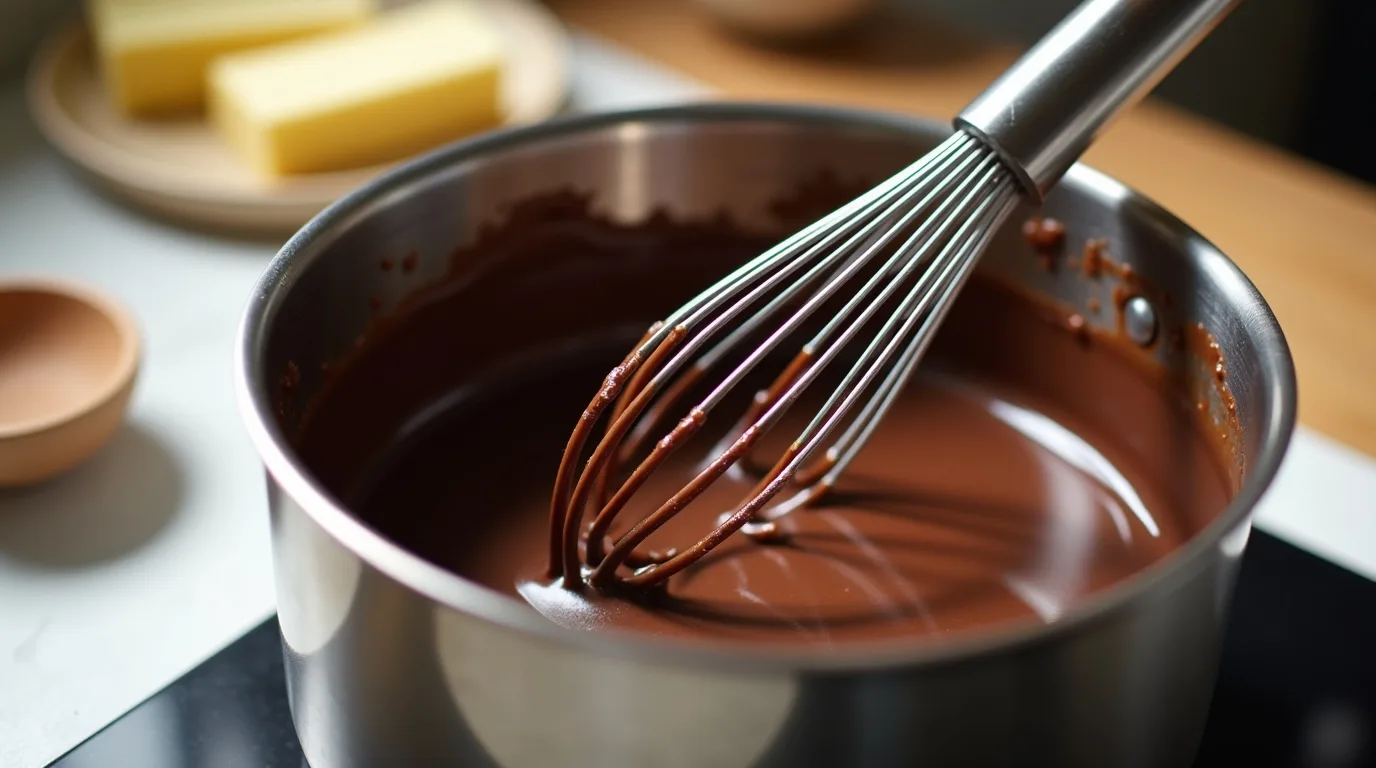
- In a heatproof mixing bowl, combine the dark chocolate and unsalted butter.
- Place the bowl over a pot of simmering water (bain-marie method) or melt gently in the microwave in short bursts, stirring between each.
- Mix until smooth, glossy, and completely melted.
💡 Tip: Avoid overheating — you want the chocolate silky, not scorched.
Step 2: Whisk the Eggs and Sugar
- In a separate bowl, whisk together the eggs, egg yolks, and sugar until the mixture becomes pale and slightly frothy.
- This step adds lightness and helps your lava cake rise beautifully while keeping the center gooey.
- Add the vanilla extract if you like a touch of sweetness and aroma.
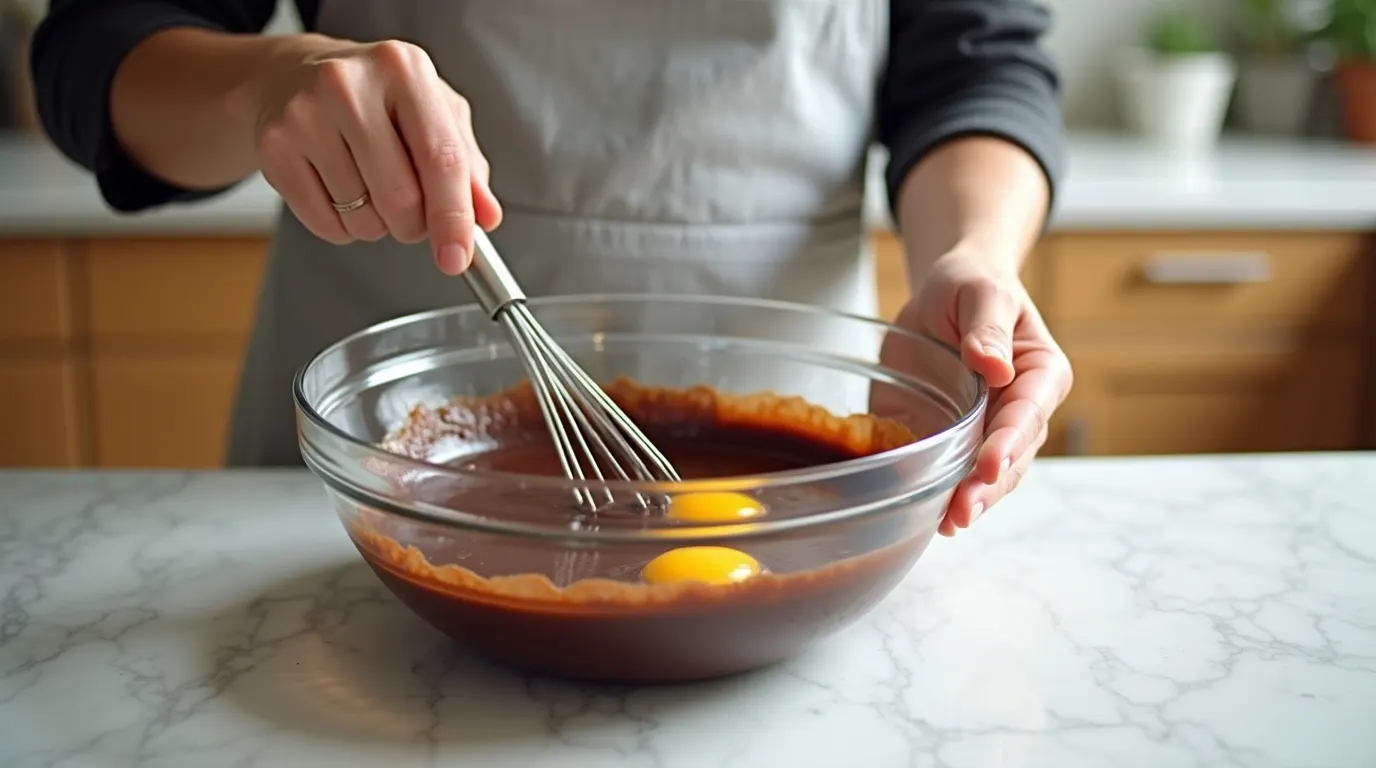
Step 3: Combine Wet and Dry Ingredients
- Slowly pour the melted chocolate mixture into the egg mixture while stirring continuously.
- Add the flour and a pinch of salt, then gently fold everything together using a spatula.
- Stop mixing as soon as the batter looks uniform — overmixing can make the texture too firm instead of molten and soft.
Step 4: Fill the Molds
- Pour the batter evenly into your buttered ramekins, filling each about ¾ full.
- For an extra molten surprise, you can press a small square of chocolate or a spoonful of ganache in the center of each before baking.

Step 5: Bake to Perfection
- Place the ramekins on a baking tray and bake in a preheated oven (200°C / 390°F) for 10–12 minutes.
- The secret is timing: the edges should be firm while the center stays soft and slightly jiggly.
💡 Pro tip: Every oven is different — start checking at 10 minutes to avoid overbaking your chocolate lava cakes.
Step 6: Unmold and Serve
- Let the cakes rest for 1–2 minutes after baking.
- Carefully run a knife around the edges and invert each cake onto a plate.
- Dust with powdered sugar, drizzle melted chocolate, or add a scoop of vanilla ice cream for a heavenly pairing.
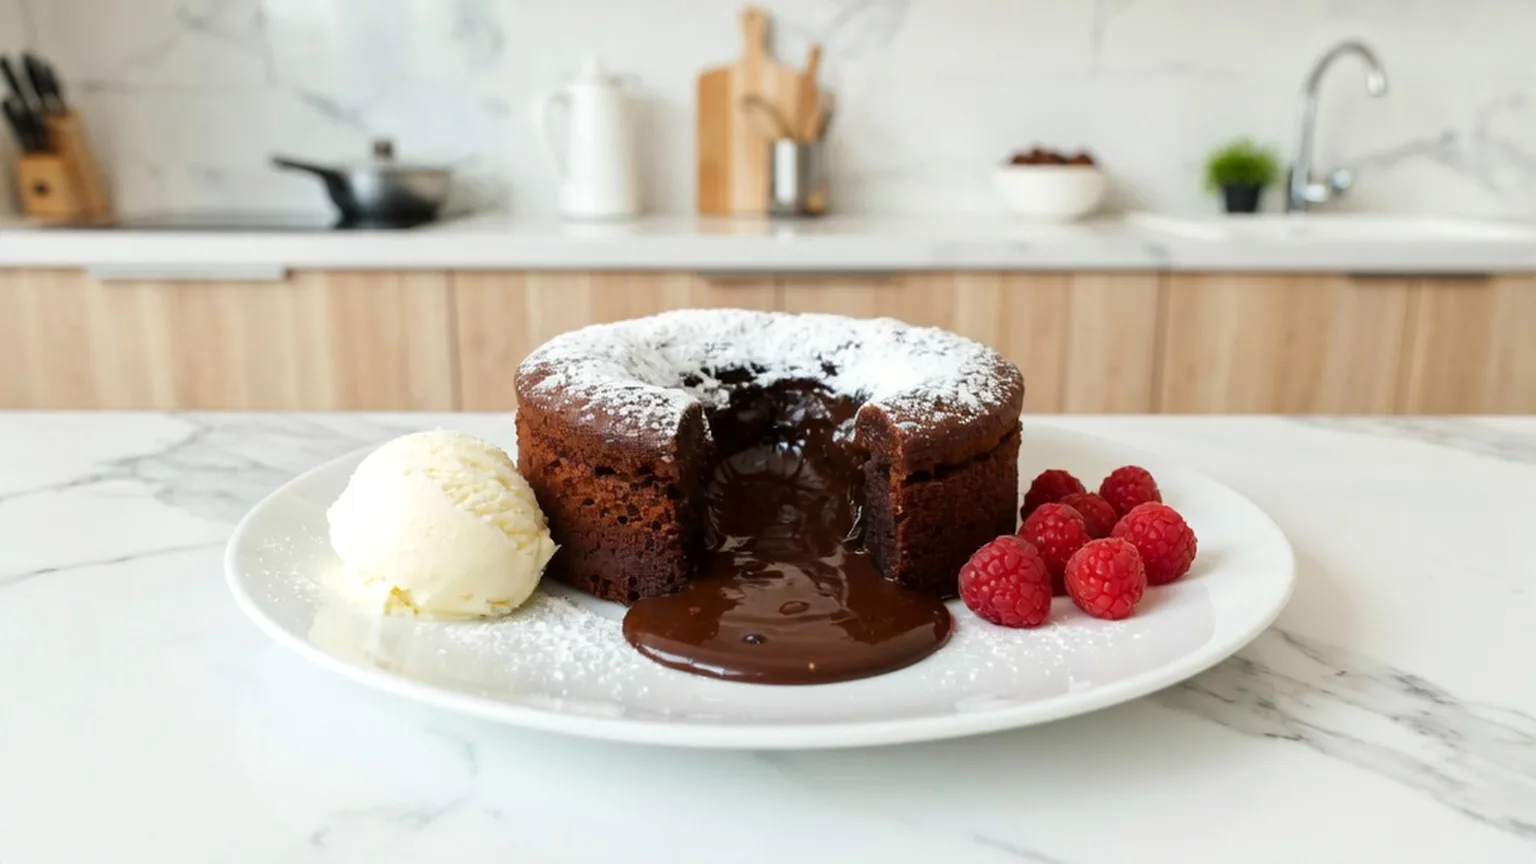
With that final touch, your chocolate lava cake is ready — warm, decadent, and irresistibly gooey inside. Each spoonful offers a burst of melted chocolate and comfort, proving that this beginner-friendly recipe truly delivers restaurant-quality results right from your kitchen.
ChocoChefAI Tip
Every great lava cake recipe hides a small secret — the fine balance between heat, timing, and texture. Even the most experienced bakers can find it tricky to get that perfect molten center, so here are a few tried-and-true insights from ChocoChefAI to help you master it like a pro.
1. Timing Is Everything
The magic moment happens between 10 and 12 minutes of baking. Pull the cakes out when the edges look set but the center still trembles slightly. That’s how you achieve the ideal gooey, melted chocolate core that flows beautifully once cut.
💬 Pro tip: If you’re using smaller ramekins or a convection oven, reduce the baking time by a minute or two to avoid overcooking.
2. Quality Ingredients, Big Results
The heart of your molten chocolate cake lies in its ingredients. Always opt for high-quality baking chocolate (70% cocoa or more) and fresh eggs. These elevate both flavor and texture, giving you a richer, smoother dessert experience.
💬 ChocoChefAI’s secret: Add a touch of espresso powder or sea salt to intensify the chocolate flavor — subtle, but unforgettable.
3. Make Ahead Like a Pro
You can prepare your batter a few hours in advance, pour it into greased ramekins, and store it in the refrigerator until baking time. When ready, bake straight from the fridge — just add 1 extra minute to the cooking time.
💬 Tip for hosts: This trick makes it the ultimate quick chocolate dessert for dinner parties — effortless and impressive at the same time.
4. Serve It Like a Chef
Presentation matters! Pair your chocolate lava cake with a scoop of vanilla ice cream, a drizzle of dark chocolate ganache, or fresh raspberries for contrast. The warm-and-cold combination enhances every spoonful.
Perfection in a lava cake isn’t about luck — it’s about a few smart choices and a little practice. With these tips from ChocoChefAI, you’ll turn every bake into a silky, restaurant-style chocolate dessert that feels like a celebration in every bite.
Creative Variations
Once you’ve mastered this beginner-friendly lava cake recipe, it’s time to get playful! One of the joys of chocolate lava cake is how versatile it can be — from flavor twists to size adjustments, there’s room for creativity without losing that irresistible molten chocolate center. Here are some ideas to inspire your next batch:
1. Chocolate Variations
- Dark chocolate lovers: Use 80% cocoa for a bold, intense flavor.
- Milk chocolate: Creates a sweeter, creamier lava that’s perfect for kids.
- White chocolate lava cake: For a lighter, visually striking dessert — pair with tart berries for balance.
2. Filled Surprises
- Caramel center: Add a teaspoon of caramel sauce in the middle before baking.
- Nut butter: A dollop of peanut or almond butter creates a luscious twist.
- Fruit surprises: Raspberry or cherry preserves add a tangy pop against rich chocolate.
3. Size Matters
- Mini lava cakes: Perfect for parties or portion control. Reduce baking time slightly for smaller molds.
- Large lava cake: Bake in a single deep dish to share — adjust timing to keep the center molten.
4. Dietary Tweaks
- Gluten-free: Swap all-purpose flour for almond flour or a gluten-free mix.
- Vegan option: Use coconut oil instead of butter and flax eggs instead of regular eggs.
💡 Pro Tip: Experiment with toppings and accompaniments — a sprinkle of sea salt, crushed nuts, or a drizzle of chocolate ganache can elevate a simple molten chocolate cake into a dessert that feels gourmet.
With these creative variations, your lava cake recipe can evolve endlessly — perfect for impressing guests, celebrating occasions, or simply indulging your chocolate cravings in new and exciting ways.
Conservation and Reuse
One of the perks of this lava cake recipe is that you can enjoy it beyond the first serving — as long as you know the best ways to store, reheat, and even repurpose it. Proper handling ensures that your molten chocolate cake stays indulgent, fresh, and gooey every time.
Storing Your Lava Cakes
- Refrigerator: Place baked cakes in an airtight container for up to 2–3 days. This preserves the rich chocolate flavor without drying out the exterior.
- Freezer: You can freeze unbaked batter or baked cakes (without toppings) for up to 1 month. Wrap individually in plastic wrap and then foil to maintain freshness.
Reheating Tips
- Oven: Preheat to 180°C (355°F) and warm the cake for 5–7 minutes. This revives the molten chocolate center beautifully.
- Microwave: Heat for 15–20 seconds, just enough to make the center ooze. Be careful not to overheat — you want that signature gooey texture.
Creative Reuse Ideas
- Mini dessert parfaits: Crumble leftover lava cakes into glasses, layer with whipped cream or ice cream, and top with fresh berries.
- Chocolate milkshake twist: Blend cooled lava cake pieces with milk or cream for an indulgent chocolate drink.
- Breakfast indulgence: Serve crumbled over pancakes or waffles with a drizzle of chocolate or caramel sauce.
💡 Pro Tip: Always store cakes separately from toppings like ice cream or fruit to prevent sogginess. That way, your chocolate lava cakes stay decadent and visually appealing whenever you serve them.
With these simple conservation and reuse tips, you can enjoy your lava cake recipe beyond one sitting — whether reheated for a quick treat or transformed into a creative dessert masterpiece.
Conclusion
Congratulations — you’ve just mastered a beginner-friendly lava cake recipe that delivers a perfectly gooey, molten chocolate center every time! With simple ingredients, straightforward steps, and a few expert tips from ChocoChefAI, this dessert proves that even home bakers can achieve restaurant-quality chocolate lava cakes without stress.
Why You’ll Love Making This Recipe
- Quick and satisfying: Ready in under 25 minutes, perfect for last-minute cravings.
- Versatile and customizable: From mini cakes to large shared desserts, plus endless flavor variations.
- Beginner-friendly: Clear instructions and simple ingredients ensure success, even for first-time bakers.
- Decadent and indulgent: Every bite delivers rich, warm melted chocolate that delights both the eyes and the palate.
💬 Parting Tip
Don’t be afraid to experiment with toppings, fillings, or even dietary tweaks. Whether it’s a family treat, a dinner party centerpiece, or a quick personal indulgence, this lava cake recipe is your go-to chocolate dessert that impresses every time.
Now it’s your turn — grab your ingredients, preheat that oven, and enjoy the magic of baking your very own molten chocolate cake. Trust us, the smiles and satisfied sighs around the table will be worth every second!
Related Recipes
If you loved this lava cake recipe, there’s a whole world of chocolate desserts you can explore next! Expanding your baking repertoire not only hones your skills but also keeps your kitchen full of indulgent, crowd-pleasing treats. Here are some related recipes that pair beautifully with molten chocolate cake:
Chocolate Chip Cupcakes
Soft, fluffy, and perfect for any occasion — these chocolate chip cupcakes are a quick alternative when you want individual treats with the same rich flavor as a lava cake.
Molten Brownies
For a fudgier take, molten brownies deliver gooey chocolate centers with a slightly denser texture — ideal for chocolate lovers craving intensity.
Chocolate Mousse
Light and airy, chocolate mousse offers a creamy contrast to the richness of a lava cake while showcasing your skills in a no-bake dessert.
Chocolate Ganache
Elevate your dessert table with a chocolate ganache — silky ganache filling in a crisp pastry shell makes for an elegant treat.
Mini Lava Cakes
Perfect for parties or portion control, these mini chocolate lava cakes maintain the same molten magic on a smaller scale, ideal for impressing guests effortlessly.
💡 Pro Tip: Link these recipes together in your blog or recipe platform to encourage readers to explore more of your ChocoChefAI chocolate desserts, boosting engagement and providing endless inspiration for chocolate indulgence.
By trying these related treats, you can keep the molten chocolate magic going while expanding your collection of easy, indulgent chocolate desserts that impress every time.
FAQs – Lava Cake Recipe
Even the simplest lava cake recipe can spark questions, especially for first-time bakers. Here are some common queries answered to help you achieve molten chocolate perfection every time.
1. Can I make lava cake ahead of time?
Absolutely! You can prepare the batter in advance, pour it into greased ramekins, and refrigerate for a few hours. Bake straight from the fridge, adding an extra minute or so to ensure the molten center stays soft.
2. How do I know when my lava cake is done?
The edges should be set and slightly firm, while the center remains soft and jiggly. Avoid overbaking — the hallmark of a perfect chocolate molten lava cake is that luscious, flowing center.
3. Can I freeze lava cake?
Yes! Both baked and unbaked lava cakes freeze well. Wrap individual cakes in plastic wrap and foil, and store up to 1 month. Bake or reheat carefully to preserve the gooey texture.
4. Why is my lava cake center not molten?
Most often, it’s due to overbaking or using too much flour. Make sure to follow the timing closely and fold the flour gently into the batter to keep the molten chocolate core intact.
5. What type of chocolate works best?
High-quality dark or milk chocolate is key. Opt for baking chocolate with at least 60–70% cocoa content for a rich, smooth flavor. Avoid chocolate chips that may not melt evenly.
6. Can I make mini lava cakes?
Definitely! Use smaller ramekins and adjust the baking time — usually 8–10 minutes. Mini lava cakes are perfect for parties or individual servings while maintaining that signature gooey chocolate center.