
Chocolate mousse recipe
Table of Contents
Introduction : Chocolate mousse recipe
If you’ve ever dreamed of serving a dessert that feels fancy, tastes heavenly, yet comes together faster than you can say “airiness is happiness,” then this chocolate mousse recipe is your new best friend. With just four simple ingredients, a bit of gentle mixing, and a touch of kitchen magic, you’ll create a mousse so light, creamy, and airy that your spoon might think it’s floating.
I love this recipe because it delivers that classic, rich dark chocolate flavor while staying surprisingly light and fluffy—thanks to a few easy tricks pastry chefs swear by (yes, even the ones who whisper about the perfect folding technique like it’s a top-secret mission). And if you’ve ever wondered how to make mousse without ending up with something grainy, dense, or suspiciously pudding-like, don’t worry—you’re in the right place.
Feel free to ask questions, share your mousse victories, or even confess your past chocolate disasters—we’ve all had a “why is my mousse soup?” moment. Today, we fix that.
Ready to whisk, fold, and chill your way to a dessert that tastes like a cloud made of cocoa? Let’s dive in.
Why Choose This Recipe
If you’ve been hunting for a chocolate mousse recipe that’s light, fluffy, and genuinely easy to pull off—even on a busy evening—this one is going to feel like a small miracle. Instead of complicated pastry techniques or endless whisking sessions, you get a simple, fast method that creates an airy chocolate mousse with irresistible flavor and cloud-like texture.
Here’s why this recipe stands out:
✨ It uses only 4 ingredients
No long grocery lists. No special pastry-school ingredients. Just the essentials you probably already have at home—yet the result tastes like something from a gourmet chocolatier.
✨ It’s quick—really quick
From melting the dark chocolate to chilling the mousse, you can have your dessert ready in minutes. Perfect for last-minute dinner guests or a midnight chocolate craving.
✨ The texture is unbelievably light
Thanks to two clever tricks (which we’ll reveal in the steps), this mousse stays soft, airy, and smooth—no graininess, no heaviness, no chocolate cement.
✨ It’s beginner-friendly—even if mousse has scared you before
No fancy equipment, no risky tempering, no “I hope this doesn’t collapse” anxiety. This recipe gently guides you through whisking, folding, and chilling with confidence.
✨ It’s endlessly versatile
Serve it in small glasses, layer it into a chocolate mousse cake, top it with fruit or praline, or keep it classic. One base recipe = infinite dessert ideas.
Here’s a professional, visually appealing recipe summary for your Chocolate Mousse Recipe:
| 🍫 Recipe Details | Info |
| ⏱ Preparation Time | 15 minutes |
| 🔥 Cooking Time | 5 minutes (melting chocolate) |
| 🕒 Total Time | 2–3 hours (including chilling) |
| 🍽 Portions | 4 servings |
| ⚡ Calories | ~280 kcal per serving |
| 🥐 Category | Info |
| 🍴 Course | Dessert |
| 👩🍳 Cooking Method | No-bake / Chilled |
| ⭐ Difficulty | Easy |
| 🌍 Cuisine | French-inspired |
| 🎯 Skill Level | Beginner-friendly |
Whether you’re making dessert for friends, treating yourself to something decadent yet light, or simply exploring quick chocolate recipes, this mousse delivers. You get elegance, speed, and flavor—all in a recipe so simple you’ll want to make it again tomorrow.
Ingredients & Equipment You’ll Need
Before we dive into the whisking and folding magic, let’s set up your workspace. One of the secrets to a light chocolate mousse is having everything ready—ingredients at the right temperature, tools within reach, and your inner chocolatier fully awakened.
🧾 Ingredients (4 simple essentials)
These amounts make 4 generous servings of creamy, airy mousse.
- 150 g dark chocolate (60–70% cocoa for the best balance of richness and smoothness)
- 3 large eggs, separated (room temperature helps the egg whites whip beautifully)
- 30 g sugar (just enough to enhance the chocolate without making it overly sweet)
- 150 ml heavy whipping cream, cold (this gives the mousse its delicate, fluffy body)
Tip: If you prefer a sweeter or milder flavor, swap part of the dark chocolate for milk chocolate.
🍽️ Optional add-ins (for fun twists)
- A pinch of sea salt
- ½ tsp vanilla extract
- Orange zest or raspberry coulis
- Cocoa powder for dusting
🛠️ Equipment Checklist
No fancy gadgets here—just kitchen basics that help you achieve the perfect, airy texture.
- Heatproof bowl (for melting chocolate)
- Small saucepan (if using the bain-marie method)
- Electric hand mixer or a whisk with serious enthusiasm
- Rubber or silicone spatula (crucial for gentle folding)
- Measuring cups or scale for accuracy
- 4 dessert glasses or ramekins
- Refrigerator (for the essential chill time)
💡 Why these tools matter
- Using a cold bowl for whipping cream gives you firmer peaks.
- A rubber spatula helps you fold without deflating the mousse.
- A heatproof bowl keeps your chocolate from burning or seizing.
With your ingredients lined up and equipment ready, you’re only minutes away from crafting a mousse that’s smooth, elegant, and effortlessly impressive. Ready to whisk up some magic?
Preparation Steps in Detail
Now comes the fun part—turning a handful of simple ingredients into a light, airy chocolate mousse that looks (and tastes) like a pastry chef made it. Follow these steps and you’ll get perfect texture every single time, without stress or guesswork.
Step 1 — Melt the chocolate gently
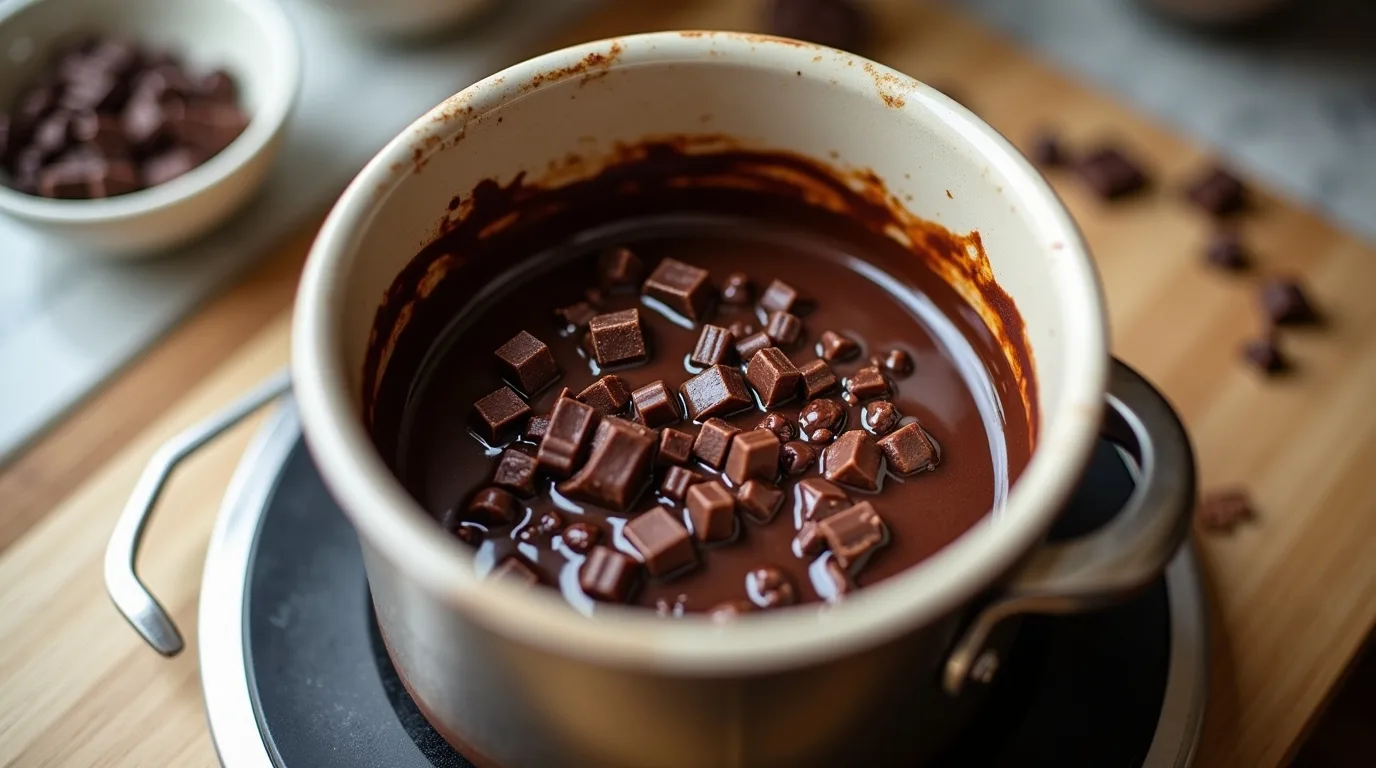
Put the chopped dark chocolate into a bowl that can safely withstand heat. Melt it slowly over a bain-marie or in the microwave using 20–30 second bursts.
- Stir between intervals to avoid scorching.
- The chocolate should be smooth, glossy, and warm—not hot.
Why it matters: Overheated chocolate can seize or curdle the mousse. Keeping it warm (not boiling) helps it blend beautifully with the other ingredients.
Step 2 — Separate and whip the eggs
Add the egg whites to a clean bowl and whip them with an electric mixer until soft peaks form. Sprinkle in the sugar gradually and keep whisking until the peaks become shiny and firm.
- Soft peaks = floppy tips.
- Firm peaks = the whisk leaves clean lines and the foam stands tall.
Keep the egg yolks aside—we’ll use them in a moment.
Pro tip: Make sure the bowl is perfectly grease-free. Any trace of fat prevents the whites from whipping properly.
Step 3 — Combine chocolate with egg yolks
Once your chocolate is melted and slightly cooled, whisk in the egg yolks.
- The mixture will thicken slightly—that’s exactly what we want.
- This creates a smooth, rich base full of chocolate flavor.
If the chocolate looks grainy, it’s too hot. Let it cool a bit and whisk again.
Step 4 — Whip the cold cream
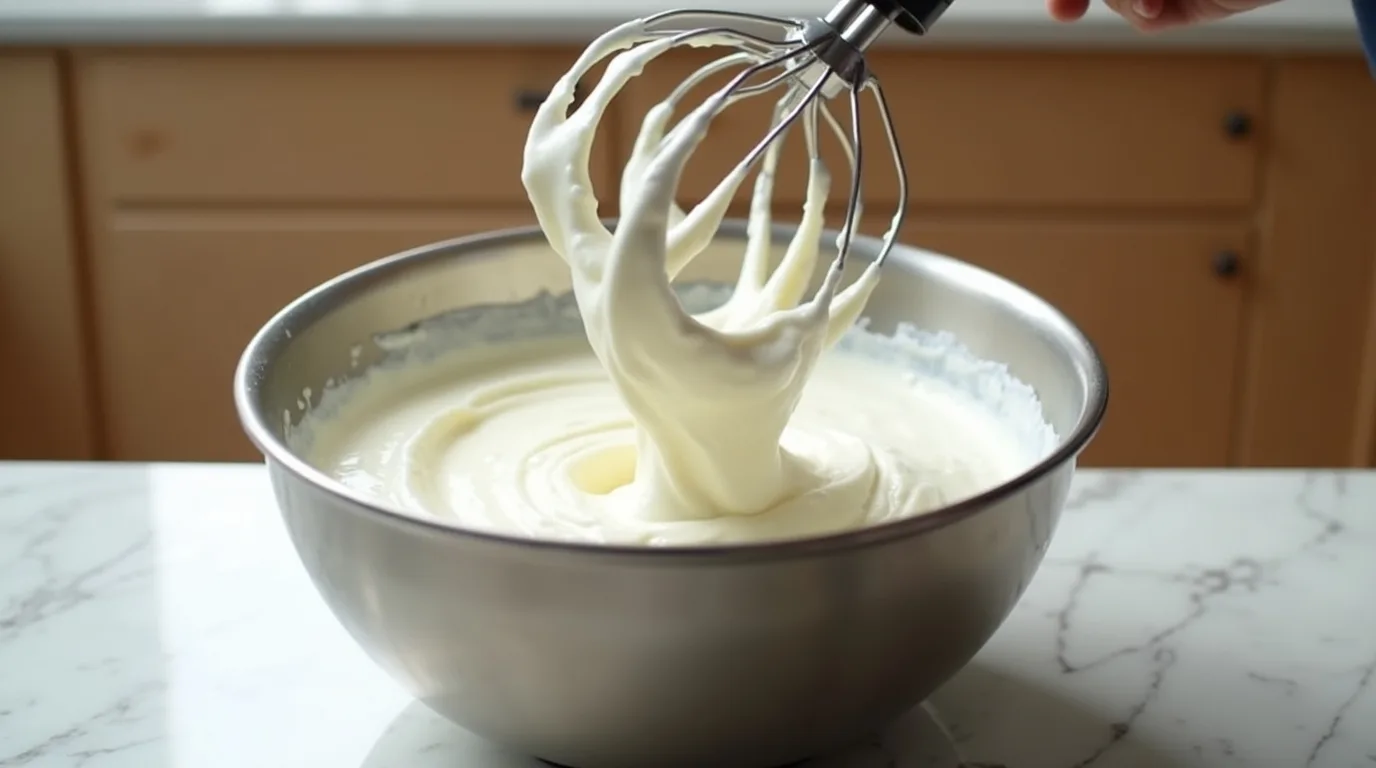
In another bowl, whip the cold heavy cream until soft, fluffy peaks form.
- Stop as soon as the cream holds shape.
- Overwhipping can make it grainy and heavy—not ideal for a light mousse.
Step 5 — Fold in the whipped cream
Add one-third of the whipped cream to the chocolate mixture and stir gently to loosen it.
Then fold in the remaining cream with slow, circular movements using a rubber spatula.
- Think “lift and fold,” not “stir like soup.”
- This step is what gives the mousse its light and airy texture.
Step 6 — Fold in the egg whites

Now gently fold the whipped egg whites into the chocolate mixture.
- Add them in two or three batches.
- Move slowly to keep as much air as possible.
This step is the secret behind the mousse’s cloud-like structure.
Step 7 — Chill and serve
Spoon the mousse into dessert glasses or ramekins. Refrigerate for at least 2 hours.
- This allows the mousse to set and develop its airy, creamy texture.
- Serve with chocolate shavings, berries, or a dusting of cocoa powder.
With these steps, you’ll create a mousse that’s silky, light, and beautifully balanced—exactly what a perfect chocolate mousse recipe should be. Enjoy the magic!
ChocoChefAI Tip
If you want your chocolate mousse to float straight into “this tastes like a professional pastry chef made it” territory, here’s the trick that changes everything: temperature harmony.
Yes—your ingredients need to be friends, not strangers. When the melted dark chocolate is too hot or the whipped cream is too cold, they don’t blend smoothly. That’s when you get lumps, streaks, or the dreaded chocolate “shock,” where everything seizes and turns grainy.
So here’s your ChocoChefAI-approved magic formula:
✨ ChocoChefAI’s Golden Rule: Match the temperatures.
- The melted chocolate should be warm—not hot.
- The egg yolk mixture should be room temperature.
- The whipped cream should be cold, but pliable, not straight from the freezer zone.
- Egg whites should be whipped at room temperature for maximum volume.
When all elements are within the same gentle temperature range, they fold together like a dream—smooth, glossy, and impossibly airy.
🌟 Bonus micro-hacks for mousse mastery
- Add your cream in small batches to avoid deflating the mixture.
- If the chocolate thickens too quickly, whisk in a spoonful of lukewarm cream to loosen it—instant rescue!
- Use a silicone spatula instead of a wooden spoon; it glides more cleanly and protects the mousse’s airiness.
This little bit of temperature mindfulness will reward you with a mousse that’s ultra-light, perfectly smooth, and bursting with deep chocolate flavor. Your future self—and your dessert guests—will thank you.
Creative Variations
Once you’ve mastered the classic chocolate mousse recipe, it’s time to have fun. Mousse is like the jazz of desserts—smooth, expressive, and an invitation to improvise. Here are some delicious ways to switch things up while keeping that signature light, airy texture.
Fruity & Fresh Twists
Add brightness and contrast with simple fruit pairings:
- Raspberry swirl: Fold in a spoonful of raspberry coulis for a tangy ripple.
- Orange zest: A little grated zest lifts the dark chocolate beautifully.
- Layered parfait: Alternate mousse and fresh berries for a colorful dessert glass.
Fruit brings acidity, which balances the richness and makes each bite feel lighter.
Intensely Chocolatey Variations
For chocolate lovers who believe “more is more”:
- Double chocolate mousse: Add mini chocolate chips or shavings for texture.
- Milk chocolate version: Swap half the dark chocolate for milk chocolate for a sweeter, creamier finish.
- Cocoa powder boost: Dust the top with high-quality cocoa for a bold, slightly bitter edge.
These variations deepen the flavor while maintaining that soft, airy texture.
Light & Healthy-ish Options
If you want something that feels indulgent but sits lightly:
- Greek yogurt mousse: Replace a third of the whipped cream with plain Greek yogurt for a tangy, lighter option.
- Low-sugar mousse: Use 85% chocolate and skip the sugar—the mousse stays rich but less sweet.
- Dairy-free twist: Use coconut cream in place of heavy whipping cream for a tropical note.
Perfect for guests with dietary preferences or anyone looking for a healthier pastry twist.
Dessert Transformations
Turn your mousse into a component of larger creations:
- Chocolate mousse cake: Spread a thick layer of mousse between chocolate sponge layers.
- Mousse tart: Fill a pre-baked tart shell with mousse and chill until firm.
- Verrines: Layer the mousse with praline, biscuits, or caramel for a gourmet dessert glass.
Each option adds structure and texture while showcasing the mousse’s elegance.
Fun & Fancy Finishes
A few final touches that elevate your mousse instantly:
- Crunchy toppings: Crushed praline, toasted nuts, or cookie crumbs.
- Spices: A pinch of cinnamon, espresso powder, or chili for a bold twist.
- Whipped cream quenelle: Add a small scoop of lightly sweetened cream for a professional finish.
With these variations, your mousse becomes a versatile canvas—perfect for celebrations, quiet evenings, or any moment when you want a dessert that feels both effortless and unforgettable.
Conservation and Reuse
One of the best things about this chocolate mousse recipe is that it keeps beautifully—so you can plan ahead, prep desserts in bulk, or transform leftovers into something new. Let’s talk storage, timing, and clever reuse ideas that save time without sacrificing taste or texture.
Storing Your Mousse
- Refrigerator: Cover the mousse with plastic wrap or a lid to prevent it from absorbing fridge odors. It will keep its airy texture for up to 3 days.
- Avoid freezing if you want to preserve the delicate fluffiness; frozen mousse can become grainy upon thawing.
- Chill before serving: Even if it’s been refrigerated, a 10–15 minute rest at room temperature softens it slightly, giving the perfect creamy mouthfeel.
Clever Reuse Ideas
Don’t let leftover mousse sit idle! A few simple tweaks can turn it into new desserts:
- Cake filling: Spread between sponge layers for a quick chocolate mousse cake.
- Parfait layers: Alternate mousse with crushed biscuits, fruit, or caramel for a show-stopping glass dessert.
- Chocolate truffles: Chill mousse until firm, scoop small portions, roll in cocoa powder or finely chopped nuts for a mini treat.
Expert Tips
- Use airtight containers to maintain freshness.
- If your mousse is slightly too soft for piping or layering, chill for an extra hour—patience pays!
- When in doubt, add a small amount of whipped cream before serving to restore loft and creaminess.
By mastering storage and reuse, your mousse becomes not just a dessert, but a versatile tool in your pastry repertoire—ready to impress, any day of the week.
Conclusion
And just like that, you’ve mastered a chocolate mousse recipe that’s fast, simple, and downright irresistible. From melting your first squares of dark chocolate to folding in the final whipped cream, you’ve created a dessert that’s light, creamy, and full of chocolatey elegance.
Why this mousse works every time
- Only four essential ingredients, yet maximum flavor.
- Foolproof techniques for a perfectly airy, smooth texture.
- Quick prep and easy chilling—perfect for last-minute dessert magic.
A few parting thoughts
Remember, mousse is as forgiving as it is decadent. Slight tweaks—like adding fruit, a splash of liqueur, or a dusting of cocoa powder—can transform it into something new and exciting. Don’t hesitate to experiment and make it your own.
So, whether you’re impressing guests, celebrating a special occasion, or indulging in a solo chocolate moment, this recipe gives you elegance without the stress. Light, fluffy, and utterly satisfying—the perfect quick chocolate recipe to keep in your dessert arsenal.
Your turn: whisk, fold, chill, and savor every spoonful. Because honestly, a cloud of chocolate this good deserves to be enjoyed fully—and maybe even twice.
Related Recipes
If you loved this chocolate mousse recipe, you’ll be thrilled to explore these other decadent, easy-to-make desserts. Each one shares the same balance of richness, simplicity, and elegance—perfect for expanding your chocolate dessert repertoire.
🍫 Chocolate Mousse Cake
Take your mousse to the next level by layering it between soft chocolate sponge. The result? A show-stopping dessert that looks professional but is surprisingly simple to assemble.
🍮 Easy Chocolate Pudding
For a creamy, velvety treat with minimal fuss, this quick pudding is a must-try. It’s smooth, chocolatey, and perfect for a weeknight indulgence.
🍓 Chocolate Mousse Parfaits
Layer airy chocolate mousse with fresh berries, biscuit crumbs, or a drizzle of caramel for a visually stunning dessert glass that’s perfect for entertaining.
🍰 Chocolate Lava Cakes
If you crave molten chocolate center magic, these individual lava cakes are the ultimate indulgence. Pair with a small scoop of mousse for an over-the-top chocolate experience.
🥥 Chocolate Coconut Cream Mousse
A tropical twist on the classic, combining rich chocolate with light coconut cream for a mousse that’s both airy and exotically flavorful.
Exploring these recipes lets you play with textures, flavors, and presentation while keeping the same core principles: simple ingredients, light texture, and chocolate perfection. Each one is an invitation to get creative and enjoy chocolate in a new, delightful way.
FAQs
Here are the most common questions about this chocolate mousse recipe, answered with tips, tricks, and insider knowledge to ensure your dessert comes out perfectly every time.
1. Is it possible to prepare chocolate mousse in advance?
Absolutely! This mousse actually benefits from a little chill time. Chill in the refrigerator for 2–3 hours before serving to allow the texture to firm up. You can even make it a day ahead—just cover with plastic wrap to prevent fridge odors.
2. Is it okay to swap dark chocolate for milk chocolate?
Yes! Using milk chocolate creates a sweeter, creamier mousse. For balance, consider reducing the sugar slightly if your recipe calls for it.
3. What if my mousse is too runny?
Don’t panic! Gently fold in a bit more whipped cream or chill the mousse longer. If it’s slightly over-mixed, extra chilling helps firm it up without compromising the airy texture.
4. Can I replace heavy cream with something else?
Yes—coconut cream works well for a dairy-free version, and Greek yogurt can lighten the mousse slightly for a tangy variation. Just be mindful that substitutes may slightly alter texture and flavor.
6. How do I get a light and airy texture every time?
The key is in folding, not stirring. Incorporate whipped cream and egg whites gently to retain as much air as possible. Temperature control—warm chocolate, room-temp yolks, and cold cream—is also essential.
7. Is it possible to substitute cocoa powder for chocolate?
Yes, but the mousse may need extra sugar and a small amount of melted butter to replicate the richness and smooth texture of melted chocolate.
8. How long does chocolate mousse last?
Stored properly in an airtight container in the fridge, it lasts up to 3 days. Avoid freezing if you want to preserve the delicate fluffiness.