Dots candy chocolate Recipe
Table of Contents
Introduction: Dots candy chocolate Recipe
Have you ever wondered what makes Dots Candy Chocolate such a timeless treat? 🍬 This playful combination of chewy dots candy and smooth melted chocolate brings together the joy of childhood sweets and the indulgence of a quick chocolate recipe you can easily make at home. Whether you’re craving a light dessert, experimenting with dark chocolate, or just looking for a fun weekend project, this recipe offers something for everyone.
I still remember the first time I recreated this candy in my own kitchen — the aroma of baking chocolate, the glossy texture as it cooled, and the irresistible temptation to taste it right away. With a few simple ingredients and a sprinkle of creativity, you’ll see why Dots Candy Chocolate isn’t just another sweet—it’s a bite-sized celebration of flavor, nostalgia, and joy. So, are you ready to bring a little candy magic into your kitchen today?
Why Choose This Recipe
If you’re looking for a treat that’s both nostalgic and effortlessly modern, Dots Candy Chocolate is the perfect choice. It’s that rare dessert that makes both kids and adults light up with excitement — a sweet reminder of classic dots candy mixed with the rich comfort of smooth melted chocolate.
Unlike complicated baking chocolate desserts, this recipe is simple, quick, and fun to make — even if you’re not a professional pastry chef. Whether you want a light dessert after dinner or a creative project for the weekend, this quick chocolate recipe will fit perfectly into your routine.
Here’s why you’ll love it:
- 🍫 Fast and easy: Ready in minutes, with ingredients you probably already have.
- 🍬 Playful and colorful: The chewy dots add a fun, vibrant twist to classic chocolate candy.
- 🌱 Customizable: You can use milk chocolate, dark chocolate, or even white chocolate depending on your taste.
- 🍰 Perfect for all occasions: Ideal for parties, gifts, or simply a cozy movie night snack.
- 💡 Beginner-friendly: No special pastry skills required — just melt, mix, and chill!
The true distinguishing feature of this recipe lies in its versatility. Want something extra indulgent? Try a layer of dark chocolate for a deep cocoa flavor. Craving something lighter? Go for milk chocolate or add a sprinkle of sea salt for balance.
Each bite delivers a mix of textures — the silky smoothness of chocolate paired with the gentle chewiness of candy — a combination that feels nostalgic yet surprisingly refined.
Here’s a professional and visually appealing recipe summary for your Dots Candy Chocolate recipe, formatted in a clear table and fully user-friendly for blog or recipe platforms:
| Recipe Details | Information |
| Preparation Time | 10 minutes |
| Cooking Time | 5 minutes (melting chocolate) |
| Total Time | 15 minutes |
| Portions | 20–25 bite-sized candies |
| Calories | ~90 kcal per piece (depending on chocolate type and candy) |
| Categorize Recipe | Information |
| Course | Dessert / Snack |
| Cooking Method | No-bake / Melting Chocolate |
| Difficulty | Easy |
| Cuisine | American / Candy-Inspired |
| Skill Level | Beginner-Friendly |
💡 ChocoChefAI Tip: This recipe is perfect for quick chocolate cravings, parties, or gift-giving. It’s simple enough for beginners but offers plenty of room for creative variations and personal touches.
So, if you’ve ever wanted to recreate your favorite dots candy chocolate at home, this is your invitation to do it. Simple steps, endless creativity, and a dash of sweetness — that’s what makes this recipe truly unforgettable.
Focus on Ingredients and Equipment Required
Before diving into the fun part — melting and mixing your Dots Candy Chocolate — let’s make sure you have everything ready. Having your ingredients and tools prepared in advance makes the whole process smoother and more enjoyable. Think of this as your little pre-dessert ritual!
Ingredients (for about 20–25 pieces)
Each ingredient plays an important role in creating the perfect balance between creamy, chewy, and chocolatey.
- 200 g of milk chocolate – smooth and comforting; you can swap for dark chocolate if you prefer a richer flavor.
- 1 tablespoon of unsalted butter – adds a glossy finish and helps the chocolate melt evenly.
- ½ teaspoon of vanilla extract – enhances sweetness and depth.
- ½ cup of Dots Candy – the stars of the show! Choose from your favorite dots flavors like cherry, lemon, or lime.
- A pinch of sea salt – optional, but it beautifully balances the sweetness.
💡 Pro tip: If you want a gluten-free dessert, make sure your dots candy are certified gluten-free (some varieties are!).
Equipment Needed
A few simple tools are all you need — no fancy pastry setup required!
- Microwave-safe or heatproof bowl – for melting your baking chocolate or melted chocolate.
- Rubber spatula – to stir smoothly and avoid air bubbles.
- Candy mold or silicone tray – gives your candies a neat, professional shape.
- Baking sheet lined with parchment paper – ideal if you want to create flat chocolate discs with candy dots on top.
- Refrigerator space – essential for cooling and setting your candies quickly.
A Few Extra Tips Before You Start
- Use high-quality chocolate bars instead of chips for smoother melting.
- Melt the chocolate slowly to avoid burning — patience always pays off in chocolate making.
- If you don’t have candy molds, don’t worry! A simple spoon and a parchment-lined tray will do the trick.
With everything ready and organized, you’re now set to bring this Dots Candy Chocolate recipe to life. Gather your ingredients, clear your workspace, and let’s move to the most satisfying part — making these adorable, bite-sized treats!
Preparation Steps in Detail
Now that your ingredients and tools are ready, it’s time for the fun part — creating your own Dots Candy Chocolate! Don’t worry, this is a simple and rewarding process that feels almost therapeutic. The key is to take your time and enjoy the transformation of rich melted chocolate into colorful, bite-sized treats.
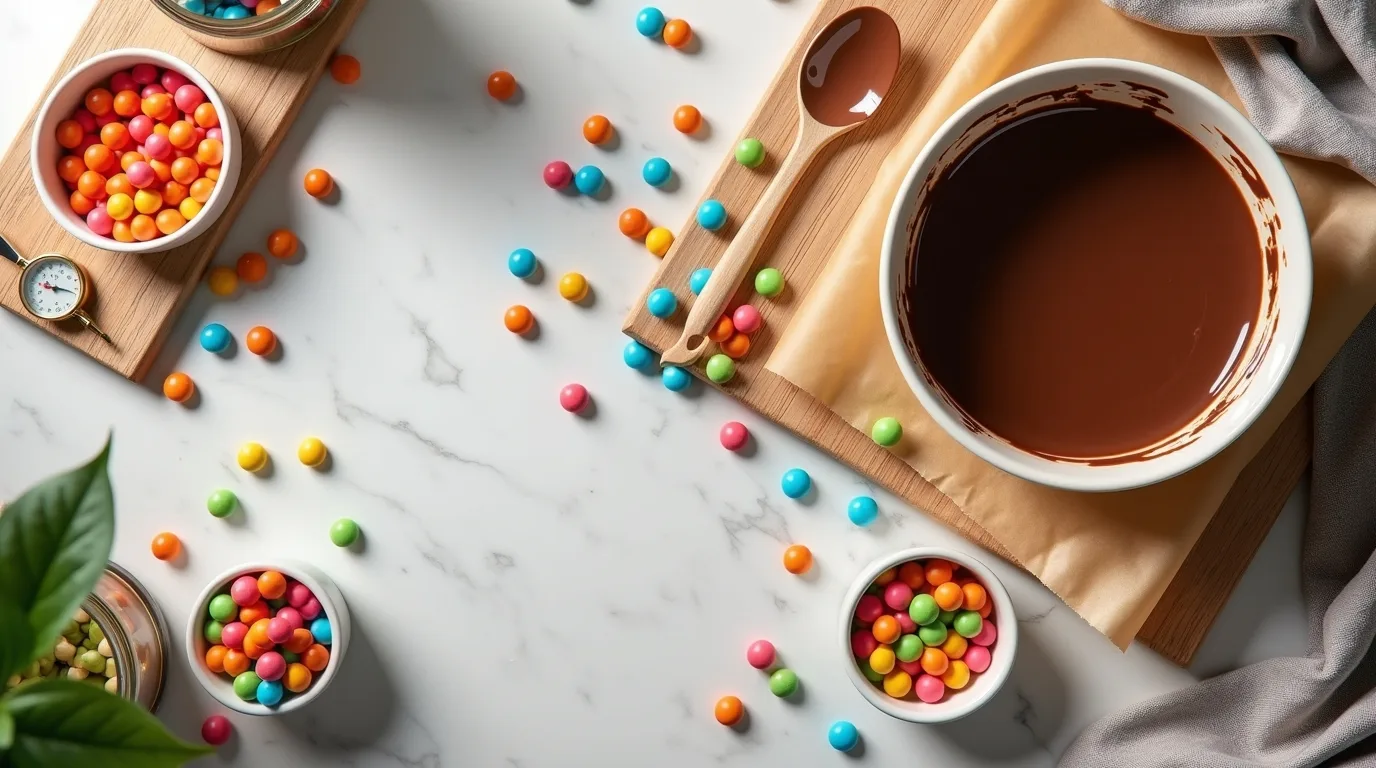
Step 1: Melt the Chocolate
- Chop your milk chocolate (or dark chocolate) into small, even pieces. This helps it melt smoothly without clumping.
- Place the chocolate and butter in a microwave-safe bowl or use a double boiler if you prefer more control.
- Melt in short intervals — about 20 seconds at a time in the microwave — stirring between each round until the mixture is silky and lump-free.
- Stir in the vanilla extract for extra depth and aroma.
💡 Tip from ChocoChefAI: Avoid overheating. Chocolate can lose its shine if it gets too hot. If you notice a grainy texture, you can rescue it by adding a teaspoon of warm milk or coconut oil.
Step 2: Prepare the Candy Layer
- While your chocolate is melting, prepare your Dots Candy by sorting your favorite dots flavors (strawberry, lime, cherry, or lemon).
- If you’re using candy molds, lightly brush them with butter or line a tray with parchment paper.
- Sprinkle a few dots candy pieces into each mold cavity or space them evenly on the tray. This gives your chocolates that cheerful, colorful touch!
Step 3: Pour and Combine
- Gently pour the melted chocolate over the dots candy, covering them halfway or completely — depending on the look you want.
- Use your spatula to even out the surface.
- Tap the mold or tray lightly on the counter to remove air bubbles and create a smooth finish.
💡 Want to get creative? Mix in tiny candy dots on paper or crushed sour dots for a fun texture surprise.

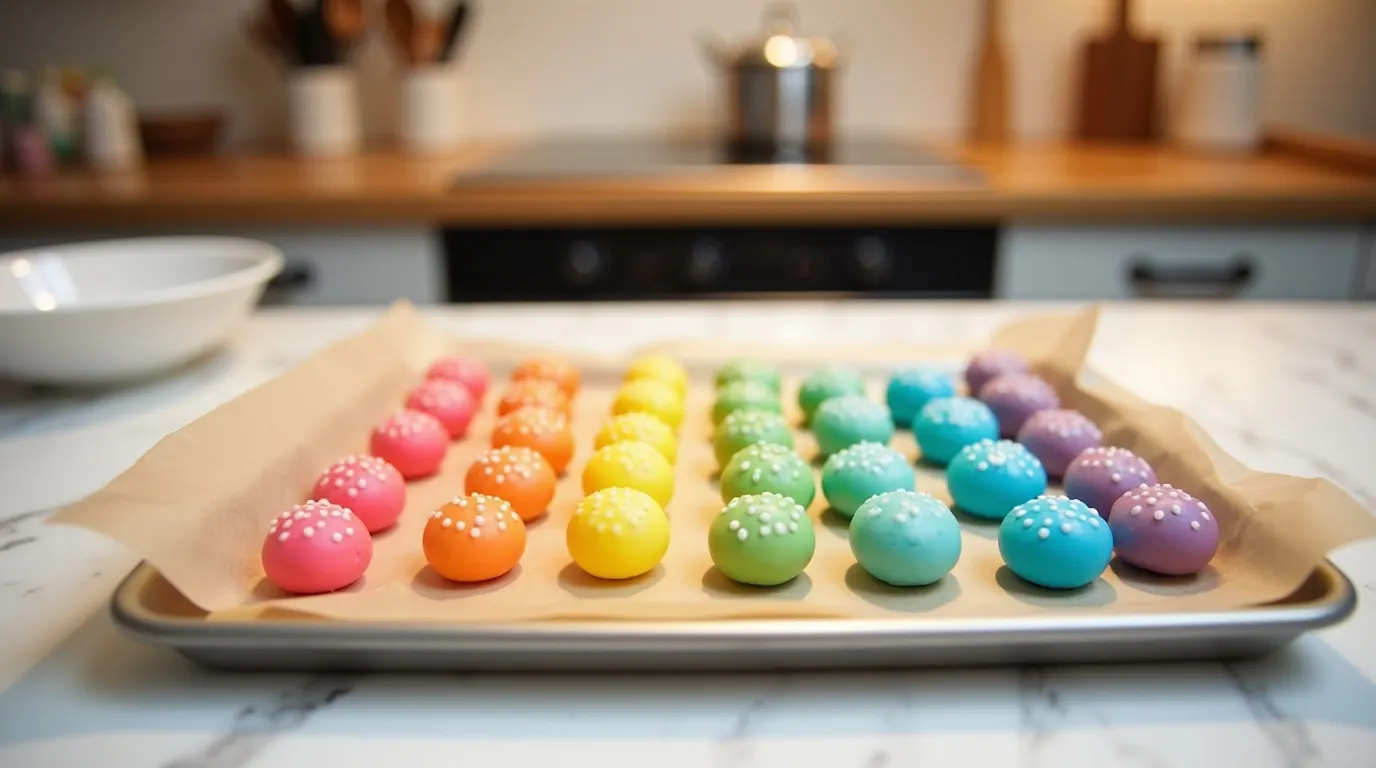
Step 4: Chill and Set
- Transfer your tray or molds to the refrigerator. Let them chill for about 20–30 minutes, or until the chocolates are firm.
- Once set, gently pop them out of the mold or peel them off the parchment paper.
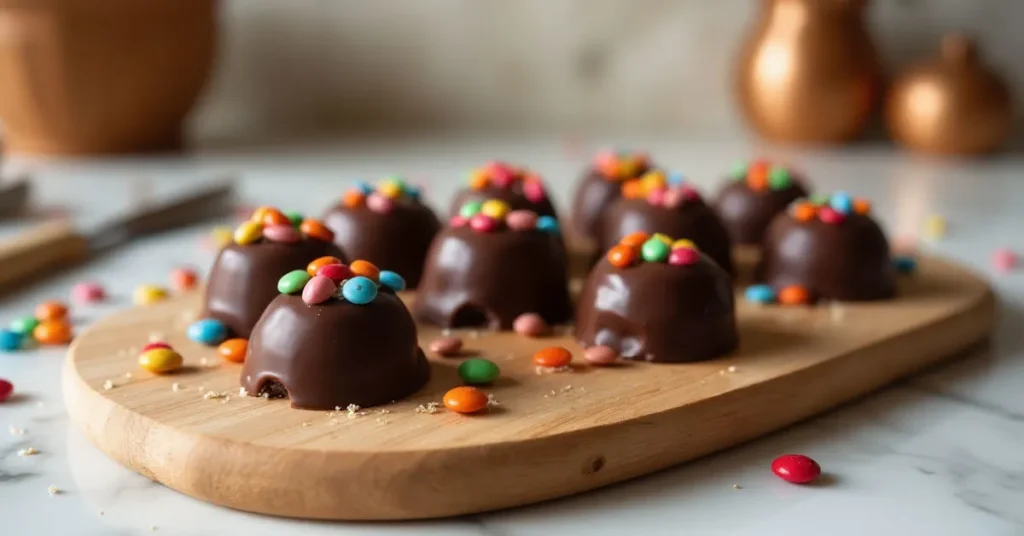
- Take a moment to admire your work — those glossy, colorful chocolates look almost too good to eat!
Step 5: Enjoy the Magic
Your Dots Candy Chocolate is now ready to enjoy! Serve them at parties, gift them in pretty jars, or keep a few in the fridge for a quick light dessert.
Each bite combines the creaminess of baking chocolate with the playful chew of dots candy, making this one of the most joyful and quick chocolate recipes you’ll ever make.

ChocoChefAI Tip: Elevate Your Dots Candy Chocolate
Here’s a little insider advice straight from ChocoChefAI to make your Dots Candy Chocolate even more magical. These tips will help you get professional-looking results while keeping the recipe fun, approachable, and delicious.
1. Perfect Chocolate Melt
- Always melt your chocolate slowly, either in a double boiler or in short bursts in the microwave.
- Stir continuously to keep the texture smooth and glossy — this creates a luxurious base for your candy dots.
- For an extra sheen, add a tiny amount of butter or coconut oil.
2. Candy Placement Matters
- When adding dots candy to the chocolate, place them gently on top rather than stirring them in.
- This keeps the colorful dots visible and creates a playful visual contrast.
- Try using a variety of dots flavors for extra fun and flavor bursts.
3. Experiment with Chocolate Types
- Don’t be afraid to mix milk chocolate, dark chocolate, or even white chocolate layers.
- Each chocolate type offers a different flavor profile and texture, letting you customize the treat for yourself or your guests.
4. Creative Presentation Tips
- Use small candy molds or silicone trays for neat, bite-sized pieces.
- For a rustic look, spoon chocolate over the dots candy on parchment paper — it’s simple but visually charming.
- Add a light sprinkle of crushed sour dots or edible glitter for a festive touch.
5. Temperature and Storage
- Chill chocolates in the refrigerator for faster setting, but avoid moisture — condensation can dull the shine.
- Store finished candies in an airtight container in a cool, dry place. They stay fresh for up to 2 weeks, making them perfect for gifts or snacking.
6. Fun Twist Ideas
- Layer chocolate dots with peanut butter or caramel for added richness.
- Pair with a scoop of ice cream for a playful cotton candy dippin dots style dessert.
- Use different molds to create themed shapes for holidays or parties.
💡 Pro Insight: The magic of Dots Candy Chocolate isn’t just in the taste — it’s the creativity it sparks. From choosing your favorite dots flavors to experimenting with chocolate types and shapes, each batch becomes a unique, personalized treat.
By following these simple tips, your homemade candy will look professional, taste incredible, and impress everyone lucky enough to try it!
Creative Variations
One of the best things about Dots Candy Chocolate is how versatile it is. Once you’ve mastered the basic recipe, you can let your imagination run wild with flavors, textures, and presentations. Below are some suggestions to inspire your next batch:
1. Flavor Mix-Ups
- Combine milk chocolate with dark chocolate layers for a sophisticated flavor contrast.
- Add a hint of mint extract or orange zest to your melted chocolate for a refreshing twist.
- Sprinkle in crushed sour dots or dots flavors like cherry, lemon, and lime to create playful bursts of taste.
2. Texture Enhancements
- Mix in finely chopped nuts, seeds, or crispy rice for a satisfying crunch.
- Add a light drizzle of white chocolate over your dots candy chocolate for a marbled effect.
- For a chewy surprise, layer small pieces of caramel or soft nougat between chocolate layers.
3. Presentation Ideas
- Use themed silicone molds to create holiday or party shapes.
- Place dots candy on paper for a whimsical, almost “DIY candy shop” appearance.
- Wrap individual pieces in colorful parchment paper or gift jars for a fun, shareable treat.
4. Fun Pairings
- Serve your Dots Candy Chocolate alongside a scoop of ice cream or a dollop of whipped cream for an indulgent dessert.
- Pair with a hot drink like coffee, cocoa, or tea to complement the sweetness of the candies.
💡 ChocoChefAI Tip: Don’t be afraid to experiment! The best part of making dots candy chocolate at home is the freedom to personalize flavors, textures, and colors. Each batch can be as playful, elegant, or adventurous as you like, making it perfect for gifts, parties, or simple indulgence at home.
Conservation and Reuse
Once you’ve created your delightful Dots Candy Chocolate, you might wonder how to keep it fresh or reuse leftovers creatively. With a few simple tips, you can enjoy your treats for longer while reducing waste — and even repurpose your chocolate into new desserts!
1. Proper Storage
- Store your chocolates in an airtight container at room temperature or in the refrigerator if your environment is warm.
- Keep them away from direct sunlight and humidity to prevent melting or sugar bloom.
- Properly stored, dots candy chocolate can last up to 2 weeks, making it perfect for gifting or snacking throughout the week.
2. Freezing for Longer Life
- To extend shelf life, freeze your chocolates in an airtight container for up to 2 months.
- Thaw slowly at room temperature to maintain the smooth texture and glossy finish.
3. Creative Reuse Ideas
- Melt and remix: Gently melt leftover chocolate and dots candy to create a new batch or drizzle over cakes, brownies, or cookies.
- Chocolate toppings: Chop or crush the candies to sprinkle over ice cream, yogurt, or parfaits.
- Decorative accents: Use leftover candy pieces as colorful garnishes for cupcakes or homemade chocolate bars.
💡 ChocoChefAI Tip: Keep small portions aside for fun, spontaneous treats. Even a few dots of candy added to a mug of hot chocolate or sprinkled over a dessert plate instantly elevates the experience.
By taking these steps, your Dots Candy Chocolate not only stays fresh and delicious but also opens doors for new culinary creations, keeping your kitchen both creative and efficient.
Conclusion
Congratulations! You’ve just created your very own Dots Candy Chocolate — a playful, colorful, and utterly delicious treat that brings together the nostalgia of dots candy with the rich indulgence of smooth melted chocolate.
This recipe proves that creating quick chocolate recipes at home can be both fun and satisfying. Whether you chose milk chocolate for a creamy bite, dark chocolate for a more intense flavor, or experimented with different dots flavors, every variation celebrates creativity in the kitchen.
Here’s what makes this recipe truly special:
- 🍬 Fun and versatile: Perfect for parties, gifts, or a cozy night in.
- 🍫 Simple yet impressive: Even beginners can achieve professional-looking results.
- 💡 Creative opportunities: Endless variations with flavor, texture, and presentation.
- 🌱 Adaptable for all tastes: Gluten-free options, light desserts, or indulgent chocolate lovers alike.
Making Dots Candy Chocolate is more than just a recipe — it’s an experience. It encourages you to play with flavors, experiment with presentation, and share joy with friends and family.
So, next time you want a quick chocolate dessert that’s both visually delightful and irresistibly tasty, remember this recipe. And don’t forget — the best part of candy-making is tasting your creations and making new memories along the way!
Related Recipes
If you enjoyed making Dots Candy Chocolate, you’ll love exploring these other delightful chocolate creations from ChocoChefAI. Each recipe is designed to be approachable, fun, and packed with flavor, giving you even more ways to satisfy your sweet tooth.
Chocolate Ganache Cups
- Smooth, creamy, and perfect for filling with fruit or nuts.
- Quick to make and ideal for gifts or special occasions.
Homemade Chocolate Truffles
- Rich, decadent, and customizable with your favorite flavors.
- Easy to roll and coat in cocoa powder, nuts, or sprinkles.
Mini Chocolate Cupcakes
- Light, fluffy, and topped with melted chocolate and candy bits.
- Perfect for parties, dessert tables, or quick treats.
Healthy Dark Chocolate Bark
- Combines dark chocolate with nuts, seeds, and dried fruit.
- A guilt-free snack that still satisfies chocolate cravings.
Quick Chocolate Fudge
- Creamy, rich, and ready in under 30 minutes.
- Can include dots candy or sour dots for added texture and color.
💡 ChocoChefAI Tip: These recipes pair wonderfully with your Dots Candy Chocolate, letting you mix and match treats for parties, gifts, or dessert platters. Experimenting with different chocolates and toppings can turn a simple treat into a memorable experience for your friends and family.
FAQs (Frequently Asked Questions)
To make your experience with Dots Candy Chocolate even smoother, here are some common questions answered. These tips help ensure your treats come out perfect every time and guide you in experimenting with flavors and variations.
1. Are Dots Candy gluten-free?
Yes! Most standard dots candy are gluten-free, but it’s always best to check the packaging to ensure it meets your dietary needs.
2. Where can I buy Dots Candy?
You can find dots candy at major supermarkets, specialty candy stores, or online retailers like Amazon. Look for your favorite flavors to make the recipe extra fun!
3. Can I use milk, dark, or white chocolate?
Absolutely! Each chocolate type offers a unique flavor profile:
Milk chocolate: Creamy and sweet.
Dark chocolate: Rich and intense.
White chocolate: Sweet and smooth with a subtle vanilla note.
4. How long does Dots Candy Chocolate last?
When stored in an airtight container in a cool, dry place, your chocolates stay fresh for up to 2 weeks. You can also freeze them for longer storage.
5. Can I make a cotton candy dippin dots version?
Yes! Simply layer the chocolate over cotton candy dippin dots or sprinkle the candies on top for a whimsical, playful twist.
6. Any tips for melting chocolate perfectly?
Melt slowly, in short bursts or over a double boiler.
Stir continuously to avoid clumps or burning.
Add a teaspoon of butter or coconut oil for extra smoothness and shine.
7. Can I mix in other toppings?
Definitely! Nuts, crushed candy, sprinkles, or even edible glitter make fun textures and elevate the presentation of your Dots Candy Chocolate.